
Feb. 23, 2024
Oil seals play a crucial role in preventing leaks and maintaining proper lubrication in various components of a truck's engine, transmission, and axle systems. Over time, these seals may wear out or become damaged, necessitating replacement to ensure optimal performance and prevent oil leakage. In this guide, we'll walk you through the process of replacing an oil seal on a truck, highlighting key steps and considerations along the way.
Step 1: Gather the Necessary Tools and Materials
Before starting the replacement process, gather the following tools and materials:
Socket set
Wrenches
Screwdrivers
Pry bar or seal puller
Hammer
Replacement oil seal
Clean rags
Lubricating grease
Gasket sealant (if necessary)
Jack and jack stands (if working underneath the truck)
Step 2: Prepare the Vehicle
Park the truck on a flat, level surface and engage the parking brake. If necessary, safely raise the truck using a jack and support it with jack stands to provide clearance for accessing the area where the oil seal is located. Ensure that the truck is securely supported before proceeding.
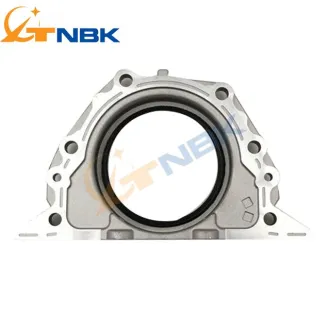
Step 3: Locate the Faulty Oil Seal
Identify the location of the faulty oil seal. Common areas where oil seals are found include the engine crankshaft, transmission output shaft, differential housing, and axle shafts. Consult the truck's service manual or seek professional guidance if unsure about the specific location of the oil seal.
Step 4: Remove the Old Oil Seal
Using appropriate tools such as a pry bar or seal puller, carefully remove the old oil seal from its housing. Take care not to damage the surrounding components or the sealing surface. If necessary, use a hammer and screwdriver to gently tap the seal out of place.
Step 5: Clean the Sealing Surface
Thoroughly clean the sealing surface and surrounding area using clean rags. Remove any dirt, debris, or old gasket material to ensure a clean and smooth surface for the new oil seal to seat properly. Inspect the sealing surface for any signs of damage or irregularities that may affect the seal's performance.
Step 6: Install the New Oil Seal
Apply a thin layer of lubricating grease to the outer circumference of the new oil seal to facilitate installation and provide initial lubrication. Carefully position the new seal in place, ensuring that it is properly aligned with the sealing surface. Use a seal driver or a suitable sized socket to evenly seat the seal into its housing until it is flush with the surrounding surface.
Step 7: Reassemble and Test
Once the new oil seal is installed, reassemble any components that were removed or loosened during the replacement process. Double-check all connections and fasteners for proper tightness and alignment. Lower the truck from the jack stands and test-drive the vehicle to ensure that the oil seal replacement was successful and that there are no signs of leakage.
Step 8: Monitor for Leaks
After the replacement, monitor the area around the new oil seal for any signs of oil leakage during subsequent use of the truck. If leaks are detected, reinspect the seal and surrounding components for proper installation and potential issues that may require further attention.
Conclusion:
Replacing an oil seal on a truck is a straightforward process that can be accomplished with basic tools and mechanical knowledge. By following these step-by-step instructions and taking proper precautions, you can successfully replace a faulty oil seal and restore proper function and reliability to your truck's drivetrain components. Regular inspection and maintenance of oil seals are essential for prolonging the lifespan of truck components and ensuring safe and efficient operation on the road.
Previous: Common Agricultural Machinery Applications of Oil Seals
Next: None
If you are interested in sending in a Guest Blogger Submission,welcome to write for us!

All Comments ( 0 )